Showing posts with label Marine Protected Area. Show all posts

Thursday, 12 May 2016

Pesos for Pigs: A Recycled Piggy Bank Project For Youth

These colorful piggy banks were created from 1.5 Liter Coke bottles!

Children from the coastal communities had a blast making these piggy banks

Hello and greetings from the Philippines! For this BLOG I want to share with all of my teacher friends and Environmental Educators in the United States one way Filipinos are recycling here: by making piggy banks out of 1.5 Liter soda bottles! This piggy bank project has been enormous fun for all ages – and I believe children in the US would enjoy this activity. It is also cheap and quick to do – great for a rainy day! Allow your students about 1 hour to complete the project. I usually have my students  make these piggy banks after a Solid Waste Management lecture, as a hands-on activity that promotes the 3R’s (Reuse, Reduce, Recycle). If anyone attempts this activity in the United States (or elsewhere in the world), please let us all know how it goes!

This activity was a hands-on component for our Solid Waste Management (SWM) lecture for children

You will need the following materials:
1.5 Liter plastic bottle with cap
4 additional soda caps for the feet
Crazy Glue (also called “Shoe Glue” in the Philippines)
Hot Glue Gun (Optional)
Soldering Gun
Moving Eyes (also called “Googly Eyes” in the United States)
Spray Paint
Scissors and box cutter
Twist ties
Yarn

*Peace Corps Volunteers - you can acquire 1.5 Liter bottles (and extra soda caps) from local Junk Shops for about a peso each

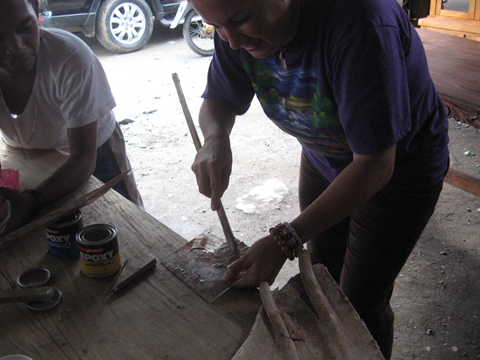
Bottles can be cut down to the desired size using scissors or box cutters

Step One: Use the box cutters and cut the end off of your 1.5 L coke bottle and put it aside for the moment. Next, trim off about 3 to 4 inches from the main part of the bottle for a smaller sized pig.

Step Two: Cut two ears to the shape of your desire from some of that plastic bottle you just trimmed away.

Step Three: Use the box cutter and make two slices where the ears will go. Insert the ear pieces into the slits. Use the Shoe Glue (Crazy Glue) to secure them in place.

Step Four: If you have a soldering gun, heat it up and burn four holes into the belly region of the plastic bottle.

Step Five: Burn two holes into each of the 4 caps, which will serve as feet. Next, use the twist ties and secure them to the plastic bottle.

Step Six: Place the bottom end onto the other half of the bottle. Connect the two, and use Shoe Glue to permanently attach them.

Step Seven: You can use the soldering gun to burn a slit for coins in the top of the piggy bank. A box cutter will work also.

Step Eight: Take the yarn and tie it around the “nose” of the pig and fasten the end to some place out in the open where you can spray paint the bottle. Paint your pig the color of your choice! Spray paint seems to dry extra-fast in the Philippines, so be ready to move on fairly soon after.


Bottles can be painted a variety of colors using spray paint!

Step Nine: Once your pig is dry it’s time to decorate it! You can use either a hot glue gun, or Shoe Glue to secure your eyes in place. Get creative! Add a ribbon or a feather to make her a little more festive. A black permanent marker is great for adding eye-lashes. Little straw hats make the pigs EXTRA happy. Have fun! And be sure to add a peso or a quarter into the belly for good luck and forever-wealth.


This is my God Child who had fun playing with all the piggy banks

The future Miss Universe! She had a blast with the ribbons and feathers


My God Child found another piggy bank to play with


Monday, 9 May 2016

Sea Turtle Excavation and Re-assembly Project

***Please note that it may be necessary to seek the appropriate permit and legal papers to possess a turtle skeleton while residing in the Philippines. My suggestion is to contact your local and regional BFAR offices for rules and regulations regarding the possession of marine animal remains before proceeding with your excavation and re-assembly. It is important to promote the right message within the community and to nurture conservation for these declining sea turtle species!

One of the best projects during my Peace Corps service in the Philippines  was excavating and re-assembling a turtle skeleton using marine epoxy, tape, and an electric drill. It is unclear why this turtle died, but plastic bags were found inside the stomach region, which may have contributed to the death of the animal. This turtle is one of two that I helped excavate during my service, while I also helped bury one on a beach, which had also died for undetermined reasons.

Excavating the turtle skeleton from a local beach required around 5 hours of physical labor

The carpenter and I worked on this project during the afternoons with cups of coffee and freshly baked bread from the bakery across the street. Neither of us had ever done this type of project before, but together we figured out how to re-assemble a turtle skeleton! It was a memorable period of bonding for an American and a Filipino over a project we knew would be useful to the children in the community and one that would help conserve local wildlife. We are still good friends three years after completion of this project.


Pencil was used to mark each bone

This skeleton has been a valuable teaching tool in our marine children’s museum! During our school field trips the educators emphasize how plastic bags can be devastating on marine life. I am not an expert on bones or skeletal re-construction, but I do like puzzles! And my philosophy at the time of excavation was that if I could remove each bone carefully (and label it in some way) I should be able to connect it back to the whole later during re-assembly. Use a pencil for labeling and be sure to bring many plastic baggies, and a camera for documentation. I found myself taking many pictures to remind me of which bones connected where.


Local children insisted on helping wash the turtle bones

I did my best to keep these bones organized using post-it notes

After excavation, wash and clean your turtle bones. The kids volunteered to help and were very curious about the process from beginning to finish! Take advantage of the opportunity to talk with curious spectators about turtles and conservation. This is an opportunity to bond within the community, and people were curious to learn about this animal on their beach! The children and I used soapy water and a few soft brushes for gentle scrubbing. (It is important to not rub down the areas where the bones will later connect. They serve as your “guide lines” and will fit back together perfectly if not disturbed.) Allow your bones to fully dry before gluing. Once they are dry you may begin piecing them together again. The pencil should not have washed off during the cleaning process. You can erase it later using the eraser.


Mixing marine epoxy for the first time

The carpenter showed me how to use the tools and together we slowly worked through this project 

Marine epoxy can be bought at most hardware stores in the Philippines. It’s about 80 pesos for ¼ liter (they give you two small canisters). You will need two separate mixing sticks, and you must mix both pastes equally together on a plate or in a cup or on some surface. The mixture will gradually start to harden. It becomes as hard as plastic, so be careful. Next, frost your bones like frosting a cake! Apply generous amounts of the mixed-marine epoxy to the edges of your bones and tape them together using tape to hold them in place. You can wet a sponge or a paper towel and wipe away any extra marine epoxy from your bones. It’s best to get all the extra off at the start – it will save you time during the sanding down process. Use small pieces of wood, screws, and an electric drill to hold the bones together firmly during the drying process. Use your masking tape liberally for extra stability and allow about 24 hours for drying.


I looked forward to working on this project every afternoon for many months!

The entire reconstruction process can take an extremely long time, or not long at all depending on your work speed! This skeleton took me 9 months to complete because I was working on other projects at the time, and I was dependent on the carpenter who owned the electric drill and over-saw our work space. This turtle did not have a head when it washed up on shore and so, no head is included in the final reconstruction. Also, it became too tedious to identify the little finger bones. (Perhaps if I had taken more care during the excavation process I may have been able to label them at the beginning and thus, piece them together during the final re-construction stages.)


The carpenter (Richard) is sanding down the dried marine epoxy so the shell would have a smooth finish

Richard posing for the camera! This was his first time engaging in such a project too!

Eventually, you should sand down all the rough bumps and edges of the dried marine epoxy once you finish constructing the skeleton. You can then paint your skeleton using lacquer (around 60 pesos per bottle). This will help protect the bones and give them a shiny finish. I put about 6 coats on this skeleton because I wanted it well protected. 

Again, this specimen hangs in our marine children's museum and is used elusively as a teaching tool and for educational purposes. 


The finished specimen hangs in our children's museum by the ocean

This view shows the ventral side where the "belly bones"attach

This specimen has been a valuable teaching tool during our Marine Protected Area field trips